> For the complete documentation index, see [llms.txt](https://docs.thewalletcrew.io/llms.txt). Markdown versions of documentation pages are available by appending `.md` to page URLs; this page is available as [Markdown](https://docs.thewalletcrew.io/connectors/email-provider/mailchimp.md).
# Mailchimp
Configure The Wallet Crew to send transactional emails via Mailchimp Transactional (Mandrill).
The Wallet Crew can send transactional emails through Mailchimp Transactional (Mandrill). This covers messages like pass download links, verification emails, etc.
By default, The Wallet Crew uses **its own SendGrid account**. A brand can switch to **a dedicated Mailchimp Transactional account** to centralize email activity in Mandrill, or when Mandrill is already used for deliverability monitoring.
This setup is limited to transactional sending. It does not integrate Mailchimp Marketing features like audiences or campaigns.
If the right option is not obvious yet, start with [Email provider](/connectors/email-provider.md).
## Configure a dedicated Mailchimp Transactional (Mandrill) account
Before The Wallet Crew configuration is updated, make sure Mandrill can authenticate the sender identity. In practice, that means having a Mailchimp Transactional account, generating a Transactional API key, and validating the sender domain or email address to use.
{% stepper %}
{% step %}
**Decide which sender domain to use**
Prefer a dedicated subdomain such as `wallet.yourbrand.com` or `registration.yourbrand.com`. This keeps email authentication isolated from other mail systems.
{% hint style="info" %}
Using a dedicated subdomain reduces exposure and improves security through better isolation. Using the same custom domain as the app is recommended when it makes sense for the setup.
{% endhint %}
{% endstep %}
{% step %}
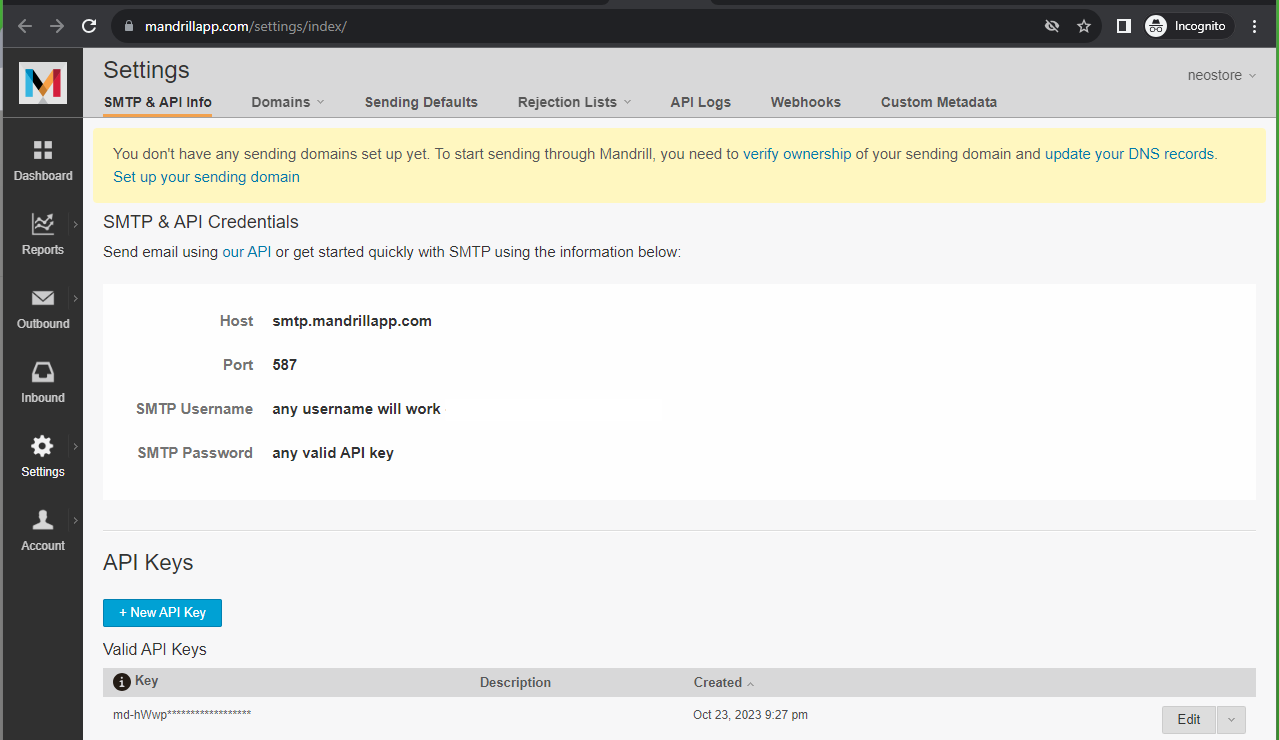
**Create a Transactional API key**
Create an API key in Mailchimp Transactional (Mandrill), because The Wallet Crew uses it to call the Mandrill send APIs on the brand behalf.
API configuration in Mailchimp Transactional.
Follow this guide: [Generate your API key](https://mailchimp.com/developer/transactional/guides/quick-start/#generate-your-api-key).
{% endstep %}
{% step %}
**Update `/server/emails.yml`**
Open the advanced configuration editor:
Then create or edit `/server/emails.yml`:
{% code title="/server/emails.yml" %}
```yaml
provider:
type: mailchimp
apiKey: md-xxxx
from:
email: support@yourbrand.com
name: Your brand support
resources:
- /locales/emails/
```
{% endcode %}
Replace `md-xxxx` with the Mandrill API key. Then set the `from` values to a sender identity that Mandrill accepts.
{% hint style="warning" %}
Treat the Mandrill API key like a password.
Do not paste it in tickets or screenshots.
{% endhint %}
{% endstep %}
{% step %}
**Save and test**
Save the file in the admin console to apply the provider change. Trigger a single transactional email from the usual flow, then confirm delivery in Mailchimp Transactional activity logs.
{% endstep %}
{% endstepper %}
## Troubleshooting
Most issues come from using the wrong key type or sending from an unverified identity. If email sending fails or nothing seems to change, start with these checks:
* **Mailchimp Marketing vs Transactional**: a **Transactional (Mandrill)** key is required.
* **401/403 from Mailchimp**: check the key, and that Transactional is enabled.
* **Emails not delivered**: verify the sender domain/email in Mailchimp Transactional.
* **Nothing changes after editing**: confirm `/server/emails.yml` was edited in the right tenant and saved.
## FAQ
Is this the same as “Mailchimp marketing emails”?
**No**. This integration only uses **Mailchimp Transactional (Mandrill)** to send transactional messages.
Is a paid Mailchimp add-on required?
Usually yes, because Transactional (Mandrill) is a separate product from standard Mailchimp Marketing plans.
Where is Mailchimp configured in The Wallet Crew?
Edit `/server/emails.yml` in the advanced configuration editor.
Does the domain need to be authenticated in Mailchimp Transactional?
**Yes**. Verify the sender identity used for `from.email` in Mailchimp Transactional. When sending from a domain, set up authentication (SPF/DKIM) and add a DMARC record for that domain or subdomain.
Can SendGrid be kept in staging and Mailchimp in production?
Yes, but it is not recommended.
Each tenant has its own configuration, so a different provider can be selected per environment. In practice, using different providers makes troubleshooting harder. It also increases the risk of provider-specific differences between staging and production (sender authentication, deliverability behavior, activity logs, and rate limits).
For a safe test environment, prefer the **same provider** in both environments. Use a different sender subdomain (for example `staging.wallet.yourbrand.com`) and send only to internal addresses.
What is the fastest way to validate the configuration?
Save `/server/emails.yml`, trigger a single email, then verify the event in Mailchimp Transactional activity logs.
---
# Agent Instructions
This documentation is published with GitBook. GitBook is the documentation platform designed so that both humans and AI agents can read, navigate, and reason over technical content effectively. Learn more at gitbook.com.
## Querying This Documentation
If you need additional information that is not directly available in this page, you can query the documentation dynamically by asking a question.
Perform an HTTP GET request on the current page URL with the `ask` query parameter, and the optional `goal` query parameter:
```
GET https://docs.thewalletcrew.io/connectors/email-provider/mailchimp.md?ask=&goal=
```
`ask` is the immediate question: it should be specific, self-contained, and written in natural language.
`goal` is optional and describes the broader end goal you are ultimately trying to accomplish on behalf of the user. GitBook uses it to tailor the answer towards what is most useful for that goal.
The response will contain a direct answer to the question and relevant excerpts and sources from the documentation.
Use this mechanism when the answer is not explicitly present in the current page, you need clarification or additional context, or you want to retrieve related documentation sections.